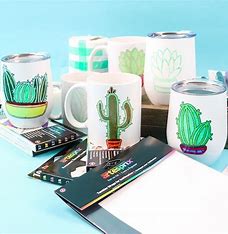
Sublimation on mugs is a fun and creative way to add a personal touch to your everyday drinkware using mug sublimation paper. By using the sublimation process, you can transfer your designs onto mugs with vibrant and long-lasting results, making it a fantastic DIY project that requires minimal equipment, perfect for anyone regardless of their artistic skills.
In this article, we’ll guide you through sublimating mugs, creating custom and impressive gifts.
So let’s start!
Quick Questions Before We Start:
1. Can I sublimate on regular paper?
Ans: No, you can’t sublimate on regular paper. Sublimation is like a magic heat transfer thingy where the ink turns into a gas and sticks to the mug’s surface. But regular paper can’t handle the high heat needed for sublimation, and it doesn’t have the special coating. So, sublimation paper is the real deal — it can handle the ink and make the transfer work like a charm. Using regular paper would be a no-go, trust me!
2. Can I use sublimation paper on mugs?
Ans: Yes, you can use sublimation paper for mugs. It’s the perfect tool to transfer your designs onto mugs like magic! This special paper is made just for mug sublimation, making it easy-peasy to add your cool and colorful designs to mugs.
3. Which sublimation paper is best for mugs?
Ans: The best sublimation paper for mugs is HTVRONT Sublimation Paper. It’s just perfect for mugs, tumblers, and all sorts of cool projects. When you use this paper, your mug designs will come out super vibrant and stay that way for a long time. HTVRONT Sublimation Paper is like a pro at making your mugs look amazing with your unique designs.
What are the materials needed for sublimation on the cup?
Here’s a list of materials and equipment you’ll need for cup sublimation:
- Sublimation Printer: This special printer uses sublimation ink to print your designs on sublimation paper accurately.
- Sublimation Ink: The ink that turns into a gas during the sublimation process, bonding with the cup’s surface to create vibrant designs.
- Sublimation Paper: Specially coated paper that holds the sublimation ink and allows for easy transfer to the cup’s surface.
- Heat-Resistant Tape: Used to secure the sublimation paper firmly to the cup during the transfer.
- Heat Press Machine: Applies heat and pressure to transfer the ink from the paper onto the cup — ensuring a permanent bond.
- Blank Sublimation Cups: These are the cups specifically designed to withstand the sublimation process.
- Protective Gloves: Gloves protect your hands from the heat during the transfer process.
- Heat-Resistant Mat: A mat to protect your work surface from the heat press machine.
- Butcher Paper: Used as a cover during the heat press process to protect the cup and transfer your design evenly.
- Thermometer: To monitor the heat and ensure proper sublimation temperature.
- Silicone Wrap or Shrink Wrap: Helps to secure the sublimation paper to the cup and prevents any shifting during the transfer.
How to do sublimation on mug?
Sublimation on mugs is an easy process, and you can follow these steps to create personalized masterpieces. Before we jump into the process, make sure you have all the materials and equipment we mentioned above.
Here’s complete guide:
Step 1: Choose Your Graphics
Select or create the designs you want to print on the mug using graphic design software.
Step 2: Print Your Chosen Graphics
Load the sublimation transfer paper for mugs into your printer and print your designs in mirror image mode.
Step 3: Cut Your Graphics to Fit Your Mug
Carefully cut out your printed designs, making sure they fit the mug’s surface perfectly.
Step 4: Adjust the Settings of Your Dye Sublimation Mug Press:
Preheat your dye sublimation mug press to around 375°F to 400°F (190°C to 205°C).
Step 5: Place Your Mug into the Heat Press
Wrap your mug with the printed design and secure it with heat-resistant tape. Then, place the mug into the mug press, ensuring the design is correctly positioned.
Step 6: Remove Your Mug from the Heat Press:
Once the sublimation is done, carefully take out the mug from the press. Be careful as it will be hot.
Step 7: Allow Your Mug to Cool
Place the mug on a heat-resistant mat and let it cool down completely before handling.
HTVRONT Sublimation Paper A4 – 8.5″x11″, 150:
HTVRONT Sublimation Paper A4 – 8.5″x11″, 150 Sheets is specifically designed for inkjet printers, making it an excellent sublimation transfer paper for mugs and other creative projects. With its convenient size and quantity, this sublimation paper is perfect for creating vibrant designs. It provides excellent print quality, allowing you to bring your creative ideas to life with ease.
Specifications:
Product Size: 8.5″x11″ A4
Package Includes: Sublimation Paper A4 – 8.5″x11″ 150 Sheets * 1
Pros:
- Compatible with all inkjet printers
- Better size & quantity
- Excellent transfer rates
- Dries quickly
Cons:
- Limited to light-colored polyester fabric.
You can buy it from here.
To Sum it Up
Sublimation on mugs is a delightful and creative DIY project. By following the easy steps and using sublimation paper for mugs with your inkjet printer, you can design vibrant and personalized mugs for yourself or thoughtful gifts.
So, here’s our article on how to sublimate mugs! Give it a try and let us know what you think in the comments section.

