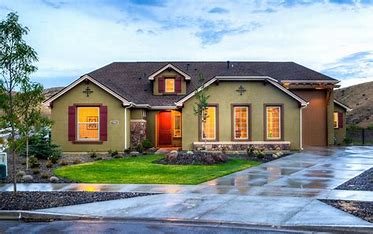
Lights, Camera, Sold! Top Tips for Taking Impressive Property Photos for Your Home Listing
Source: Pexels
A picture is worth a thousand words, and in the world of real estate, great property photos can be worth thousands of dollars! When listing your home, eye-catching images can be the key to attracting potential buyers and selling your property quickly. In this blog, we’ll cover some essential tips for taking stunning property photos tohat will make your home stand out in the real estate market.
How to Take Amazing Home Photos for Your Real Estate Listing
We’ll explore the various aspects of taking fantastic home photos, from preparing your home for the photoshoot to utilizing the right equipment and post-processing techniques. Let’s get started!
Preparing Your Home for the Photoshoot
- Declutter and Clean Your Home: Before you begin, it’s crucial to declutter and clean your home. A clean, clutter-free space creates a more inviting atmosphere and allows potential buyers to envision themselves living in the property. Remove personal items, tidy up, and give your home a thorough cleaning.
- Stage Your Home: Staging your home involves arranging furniture and décor toin a way that highlights your home’s best features. Consider hiring a professional home stager or getting inspiration from design magazines to create a warm, welcoming environment that appeals to potential buyers.
Choosing the Right Equipment
Smartphones have improved their image quality, but it’s still recommended to investing in a dedicated camera and tripod for your property photos is still recommended. A DSLR or mirrorless camera will offer better image quality and more control over the settings. HavingWhile having a wide-angle lens can also help capture the entire room, and a tripod ensures stability for crisp, sharp images.
Source: Unsplash
Utilizing Proper Lighting Techniques
- Natural Light: Maximizing natural light is crucial for creating bright, inviting images. Schedule your photoshoot during the day when sunlight is abundant. Open curtains and blinds to let in as much light as possible.
- Supplemental Lighting: Sometimes, natural light isn’t enough. In these cases, you may need to use supplemental lightings, such as external flashes or LED lights. These can help eliminate shadows and create a more evenly lit scene.
- HDR Photography: High Dynamic Range (HDR) photography involves taking multiple exposures and combining them to create a single image with balanced highlights and shadows. This technique is especially helpful when photographing rooms with large windows or bright light sources.
Composition and Framing Tips
- Corner Shots to Showcase Depth and Space: Shooting from the corners of a room can help emphasize depth and space. This perspective creates a sense of openness and allows potential buyers to appreciate the size of the room.
- Focus On Architectural Details and Unique Elements: Highlight your home’s unique features, such as custom cabinetry, intricate molding, or stylish fixtures. These details can make your property stand out from the competition and add value to your listing.
- Capture Outdoor Spaces and Amenities: Don’t forget to showcase your home’s exterior and outdoor spaces. Highlight features like patios, decks, and landscaping that make your property unique and appealing.
Source: Pexels
Post-Processing and Editing
- Correct Exposure, Contrast, and White Balance: After taking your photos, use editing software to make adjustments to exposure, contrast, and white balance. These tweaks can enhance the overall look and feel of your images.
- Remove Minor Imperfections: A background remover tool can be helpful for eliminateing distractions and minor imperfections in your images. Remove unsightly wires, outlet covers, or other small flaws to create a clean, polished look.
- Resize and Compress Images for Web Use: Ensure your images load quickly and look great online by resizing and compressing them for web use. Most listing websites have guidelines for optimal image size and file format, so be sure to follow those recommendations to ensure your photos look their best.
Source: Pexels
Dos and Don’ts
Do Showcase the Property’s Best Features
When taking property photos, focus on highlighting your home’s most attractive features. From a cozy fireplace to a luxurious master suite, these elements can help entice potential buyers to schedule a showing.
Don’t Misrepresent the Property
While it’s essential to make your home look its best, avoid using deceptive techniques or misleading angles that could give an inaccurate impression of the property. Honesty is the best policy, and misrepresenting your home could lead to disappointed buyers and wasted time.
Do Keep It Professional
Treat your property photos as a professional marketing tool. Use high-quality images, proper lighting, and thoughtful composition to present your home in the best possible light. Avoid using casual snapshots or poorly lit photos that could diminish your property’s perceived value.
Don’t Overdo the Editing
While post-processing is a crucial step in creating stunning property photos, it’s essential not to go overboard with editing. Overly manipulated images can look unnatural and may deter potential buyers. Strive for a balanced approach that enhances your images without compromising their authenticity.
Key Takeaways
Taking the time to create stunning property photos for your home listing can make a world of difference in attracting potential buyers and selling your home quickly. By using appropriate lighting techniques, paying attention to composition, and refining your images through post-processing, you’ll be on your way to creating an attractive and captivating listing.
Remember the dos and don’ts we’ve covered to make your images more professional, honest, and effective. With the right approach, you can present your home in the most favorable light, and soon, you’ll be celebrating a successful sale! Happy shooting!

